Podcast equipment: a smarter first setup
Start with the Samson Q2U for a solo show. Add wired headphones, then build around the way you record.
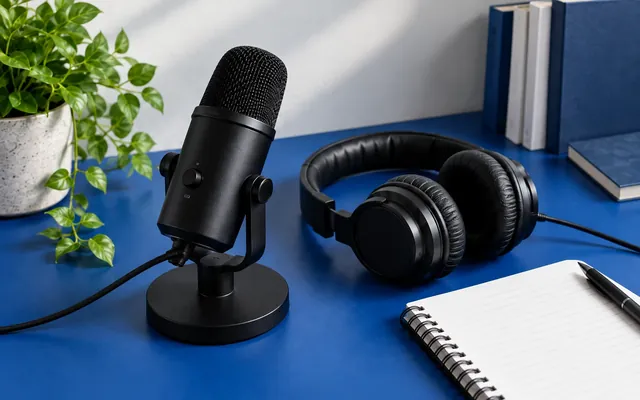
Your first podcast equipment purchase should solve a real problem. For a solo show, that is often a clear voice track. For an interview, it may be a way to hear both guests. A desk full of gear is no help if one person comes out too quiet.
I would build a small, repeatable setup first. These four picks cover a USB microphone, a more capable broadcast mic, a portable recorder, and wired headphones. You do not need to buy all four. Choose the parts that suit your own podcast, then leave room in the budget for cables and a sturdy stand.
The podcast equipment I would buy first
| Podcast gear | Best fit |
|---|---|
| Samson Q2U | A first solo show recorded on a computer. USB now, XLR later. |
| Rode PodMic USB | A fixed desk setup where you want onboard voice controls. |
| Zoom PodTrak P4next | In-person interviews with up to four XLR microphones. |
| Sony MDR-7506 | Wired monitoring while you record and edit. |
For a new show, my shopping order is simple: microphone, headphones, safe mic placement, then a way to save the audio. A solo USB mic already handles the link to your computer. A second box can wait until you need more inputs or more control.
1. Samson Q2U: my first pick for a solo podcast
The Samson Q2U makes sense when you want to start small without closing off your next step. This dynamic mic has both USB and XLR outputs. Plug it into a laptop for a one-person show. Later, use its XLR connection with an audio interface or recorder.
Why it earns a place
The current Q2U package includes a desktop tripod, an extension piece, a mic clip, a foam windscreen, and USB and XLR cables. That is useful gear for beginners. You can spend less time sorting out which small parts are missing.
A headphone jack lets you hear the mic without a distracting delay. Samson's current product page lists USB-C. Older stock can have a different USB port, so check the exact unit and the cable in the box before you buy.
What I would watch
The little desk stand is a starting point. If you have to lean down to reach the mic, a taller mic stand or boom arm belongs in the budget. The right podcast equipment should meet you at mouth height, not make you sit in a strained pose.
I would choose the Q2U for speech, a simple recording workflow, and room to grow. I would not buy two USB mics and assume any recording software can use them together. Check that first, or plan for separate XLR inputs.
2. Rode PodMic USB: more control at a fixed desk
The Rode PodMic USB is a dynamic podcast microphone with USB-C, XLR, a headphone output, and onboard voice processing. It suits a host who wants more control over the sound before it reaches the recording file.
Where the extra features help
Its built-in APHEX processing can shape your voice over USB. Settings saved through Rode's software stay on the mic. The headphone output supports direct monitoring, so you can listen while you speak. There is also an external pop filter to soften bursts of breath.
That is a useful set of tools for a regular desk show. Still, I would start with light processing. Heavy effects can make a voice sound strange, and effects saved into a track are harder to undo in editing.
The mute detail worth knowing
The headphone knob is not a universal mute switch. Rode's guide to the PodMic USB mute controls explains that its behavior depends on the app. Outside the supported apps, pressing it can stop monitoring while the mic still records. It does not mute the XLR output.
That matters when a guest asks to go off record. Check the recorded track, not just what you hear in your headphones. Also check the stand's weight limit before choosing a boom arm. This is a desk mic to support securely, not a reason to buy the cheapest clamp you can find.
3. Zoom PodTrak P4next: a shared setup for interviews
The Zoom PodTrak P4next is the pick I would consider for a small group around one table. It has four XLR mic inputs and four headphone outputs, each with its own volume control. That gives the host and guests a clear way to hear the session.
Why a recorder can beat a bigger mixer
The P4next records to a microSD card. It can save a stereo mix and separate tracks, and it runs from two AA batteries or USB power. You can bring a compact recording setup to a community room without making the laptop the center of the table.
This model records at 24-bit, 48 kHz. Check for the full P4next name when buying. The older P4 has different specs. Do not use a review of the older recorder to judge every feature on the newer one.
Leave space in the kit for the basics
You still need microphones, XLR cables, headphones, a suitable card, and power. The recorder is one part of the kit. A four-person podcast setup means four places to put a mic and four cables to keep out of the way.
I would read the P4next recording manual before a remote interview. Check how phone and USB guests share the available inputs. Do a short practice call, save the file, and listen back before inviting someone whose time is hard to replace.
4. Sony MDR-7506: wired headphones for the job
The Sony MDR-7506 is a wired, closed-back pair of over-ear headphones. Sony lists 40 mm drivers, a long cable, a carry pouch, and a 3.5 mm plug with a 6.3 mm adapter. That plug choice is useful across mics, recorders, and audio interfaces.
What podcast headphones are for
I value headphones because they can reveal trouble while there is still time to fix it. Listen for cable hum, mouth pops, a guest rubbing a mic, or a chair that creaks. A good pair does not fix those sounds. It helps you notice them.
Closed-back headphones also limit sound leaking out toward the microphone. Wired monitoring avoids the delay that Bluetooth can add. Keep the level modest. You need to hear the words clearly, not make the session loud.
Check the fit and the cable
A long cable can be useful at a shared desk and awkward in a small bag. Comfort is personal, too. Buy from a seller with a clear return policy, and check the fit during a full session. If your current wired headphones already work well, this purchase can wait.
USB mic, audio interface, or podcast mixer?
A USB microphone sends digital audio straight to a computer. An XLR mic sends its signal through an audio interface, recorder, or suitable mixer. The connection tells you how the parts fit together. It does not prove that one microphone sounds better than another.
An audio interface is often enough for one or two people at a desk. A podcast mixer adds live controls and may include recording, effects, or sound pads. Check the exact model: not every mixer saves separate tracks or records without a computer.
My rule is to buy for the number of people in the room. One host can start with a USB mic. For a co-host or regular guests, count the XLR inputs and headphone outputs you need. Multiple USB microphones can work with some apps, but compatibility deserves a full check before purchase.
Better sound quality starts with the room
Move away from a loud fan or an open window before buying more podcast equipment. Soft furnishings can reduce room echo. They will not block all street noise. A quiet time of day may help more than an extra effect in your audio software.
Keep the microphone close enough that your voice is clear without shouting. Start a few inches away, speak slightly across the front, and listen back. A dynamic mic does not erase background noise. Distance, room sound, and where the mic points all matter.
A pop filter helps with sharp bursts on words that start with P or B. A stable boom arm keeps the mic near your mouth. A compatible shock mount can reduce desk bumps. Mackie's podcast equipment checklist explains these accessories and their roles in more detail.
What changes for a video podcast?
For a first video podcast, I would use a camera or phone you already own. Give it a stable support and enough light. Check the framing with the mic and headphones in place. A sharp picture loses its value if the audience strains to hear the guest.
Run a full-length test for battery life, heat, storage, and file limits. If audio and video are saved on separate devices, clap once on camera at the start. The visible clap and its sharp sound help you line up the tracks later.
A recording routine worth keeping
Before each session, choose the right microphone input in your recording software. Ask each speaker to talk at a normal level. Leave room for a laugh or a louder sentence without the meter hitting its limit. Record a short test and play it back from the saved file.
During the show, wear headphones and keep an eye on the recording. Afterward, make a second copy before you edit. Name the files with the show, date, and speaker. Save the raw tracks so a bad edit does not cost you the original interview.
A finished episode also needs a clear route to its listeners. For school news, a short episode summary can sit in a Smore newsletter. If a grant will fund the show, separate the gear budget from ongoing staff time in your grant records.
Which setup would I choose?
For a solo host, I would start with the Q2U, wired headphones, and a quiet desk. For a fixed show that needs more voice controls, I would look at the PodMic USB. For several people in one room, the P4next makes the input and headphone count easier to plan.
The best podcast equipment is the kit you can set up with confidence each week. Buy the next piece when you can name the problem it solves. Clear words, a good guest, and a saved file are a stronger start than a studio you are still learning to use.